At the end of May we were all at my mother's for her 97th birthday. My daughter asked me if the next time I make a dress for Emily, would I also make a matching one for her doll. While I was there I took measurements of the baby doll's outfits and added it to my 'to do' list. Then early in June I saw a post on Twitter that sent me to instructables http://bit.ly/lp5iyE where they had instructions for converting a miss pattern into one for a Barbie-type doll. That gave me the idea of taking one of Emily's toddler pattern and converting it to one for her baby doll. So I downloaded the Google SketchUp (free) program so I'd be all set to go the next time I made an outfit for Emily.
Well, as you know from reading this blog several other things came up between earlu June and now. In June I took part in the sew-along at Above All Fabric making the Oliver + S Family Reunion dress http://bit.ly/iJEaPi for Emily. And it occurred to me there was the dress pattern that I could convert to a doll size. But before I could get to that I made the dresses for her cousin, Maddy and her doll, that I've described here before and also a shirt for Emily's twin brother, Jake.
So a few days ago I tackled the conversion of the Oliver + S size 2T pattern to a doll pattern. I first tried just following the directions given in the instructables post. I carefully took photos of the pattern pieces looking straight down on them and pulled them into SketchUp. I'd never used Google SketchUp before and it soon became obvious that I had no idea what I was doing. There's a great deal of help for SketchUp, including a number of YouTube videos. I discovered that it works best with 3D objects (like a barn!) that you photograph at a 45 degree angle. That makes it easy to setup your 3D axes. So I retook all my photos with the pattern piece as much at a 45 degree angle as I could do. This didn't work too badly for the front of the dress which was on a fold since I could use the fold as one of my axes.
The absolute hardest part was trying to get the pieces the size I wanted. I'd tell SketchUp that it should be 7". It would be on the screen but when I printed, it would either fill the page, or scale to some factor, that didn't seem to be under my control. Very frustrating!! I somehow managed, after several calculations to get the dress front pattern piece printed that was just about 7". At that point I decided to try a different approach. The back of the 2T dress pattern wasn't that much different than the front. The neck was a bit higher and there was a back facing attached. I could copy the 7" front dress piece, add a bit at the neck and the back facing, and make it into a back piece. Much easier!!! I made several copies of the front and adapted one to be a 'back'. I wonder if the last step in the Instructables description using Make the Cut with Pixel Trace (which was not a free program) is how they got the sizes for the pattern pieces that they wanted?
Next I tried to do the sleeve pattern. After much work, it was a disaster. I'd tried taking the photo with the corner to the front, so I sort of had a 45 degree angle, but then I couldn't get the perspectives set correctly in SketchUp so that the two underarm seams came out the same length. That was when I gave up and decided there had to be an easier way. Since I had a photo of the sleeve pattern piece, I just tried different printing sizes to get what was close to the size I needed.
I decided the neck facings and hem facing I could just figure out from the doll dress as I was going, without making pattern pieces. So finally here's the photo of the front and back pattern pieces on the fabric. The length of the dress from shoulder to hem is about 7 ". I added 1/4" seams around everything. Fortunately when I was copying the pattern in SketchUp, I copied lines for the pin tucks. 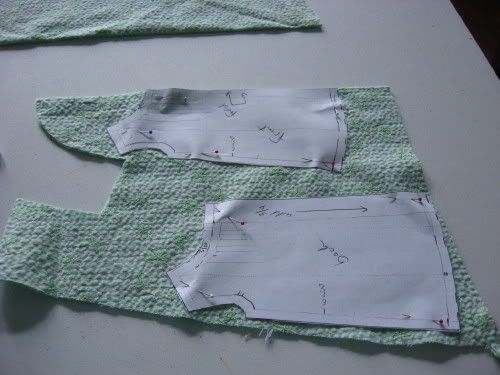
I'd added 3/4" to the back for the facing, which at the time I thought was enough. It wasn't until I was in the middle of putting the doll dress together, that I realized it should have been more. So I just made the back facing/closure a bit different from the 2T dress.
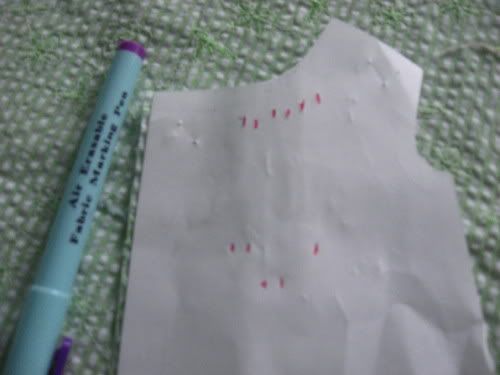
Now that I've finished the doll dress, I wonder why I ever picked something so complicated! Especially for the first attempt, when I really don't know if it's going to fit the doll or not. Have you ever tried to make pin tucks that were less then 1/4" wide? Fortunately the green and white on the seersucker fabric helped with that! I marked both sides of my pattern with a red pen and then used an air erasable marking pen to mark the fabric. Because the tucks were so close together, I'd pin and sew one before trying to pin the next.
One trick for sewing something so small and not having the fabric go below the needle plate is to hold the needle and bobbin threads. Put the end of the seam under the presser foot, and put the presser foot down. Stick the needle in the fabric. Grab the bobbin and needle threads and hold behind the needle, but don't pull them -yet. Take a stitch or two and hold those threads tight. It will keep the fabric from going under the needle plate and making a mess. On larger seams this doesn't happen, but with anything really tiny, it can, and that causes a big mess.
So here is the finished front with pin tucks.
They are not perfect. There's a bit of curve to the one on the left. Sewing that tiny is hard, plus going through the embroidery on the fabric didn't help. And I wasn't about to rip it out! I sewed the back pin tucks in the same manner.
For the back facing I used a little piece of interfacing that was the same 3/4" I'd made the facing. I set my serger for 3-thread narrow overlock and finished the back edge. For the doll dress the closure was going to be Velcro and not buttons, since this is what the purchased doll dresses used. So I only folded the 3/4" in once.
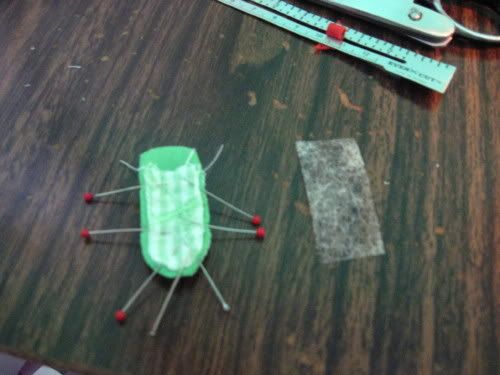
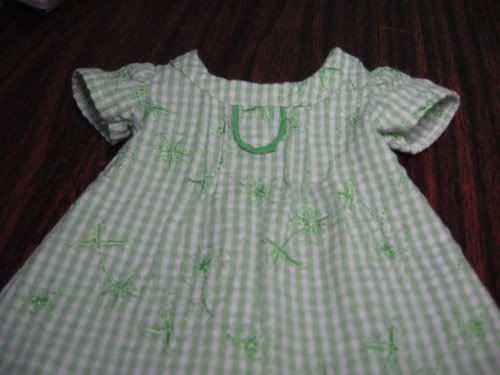
Next came the tab on the front of the dress. I had copied the size of the tab when I copied the front dress pattern, so I used that as my guide to make a tab and added 1/4" seams to it. I ran a seam 1/4" from the edge to use as stay stitching, to tell me where to turn it under and so that I could clip the curve. For Emily's dress I'd put some green fabric underneath, and so wanted to match her dress as much as possible. I cut a scrap of green and ironed it on with Stitch Witchery prior to sewing it. The photo isn't real clear, but with my fingers there you can get an idea of what size things are.
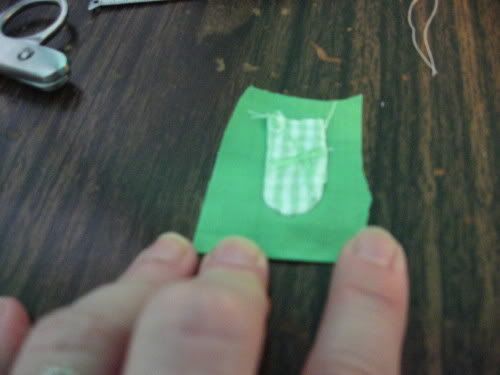
I trimmed the green leaving about 3/8" around the tab, and then stay stitched about half way on that, so I could cut around the curve. I was going to again press it with Stitch Witchery. Below is with it all pinned ready to iron onto the front of the dress.
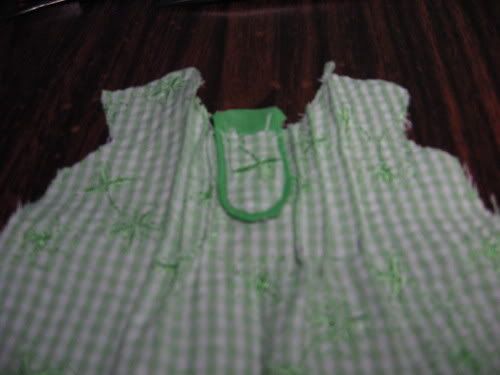
After sewing onto the dress I removed any stitches that were showing from the stay stitching. It's a little large, if you compare it to Emily's dress, but I wasn't going to fiddle with it at this point. You can see that the tab is up higher but the bottom was lined up with the mark on the pattern. I just trimmed off the extra when I did the neck facing.
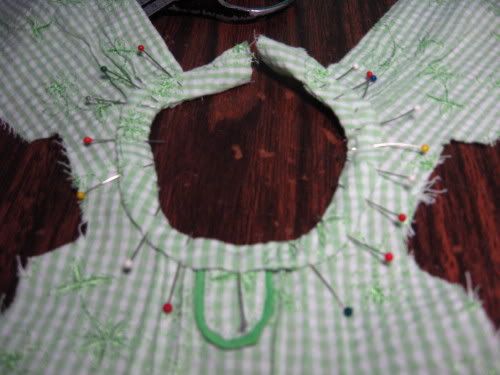
I sewed about half of the shoulder seam right sides together and the half closer to the neck wrong sides together, as per pattern instructions. Then I made patterns for the front and back neck facing using the neck of the dress as my model. I estimated that an inch wide was about what was needed and cut them from small scraps of fabric - since my able assistant was napping on the rest of the fabric, and I didn't want to disturb her.
Since I'd not totally decided how the back was going to be done because the facing wasn't as wide as it should have been, I cut the back neck facings longer than needed. I had to clip curves on the neck and trim off some of the tab so it wouldn't be too thick where it was turned. Here it is all pinned and ready to sew.
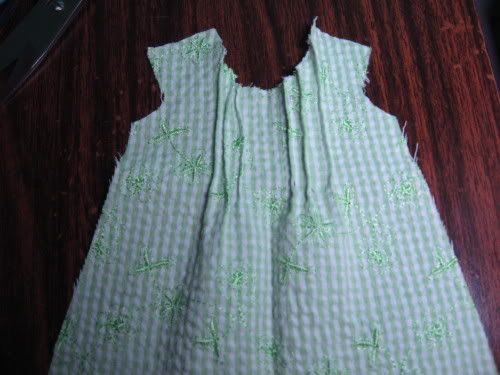
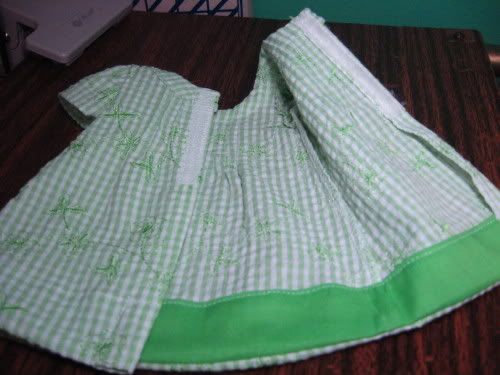
Putting the sleeves in was difficult because everything was so small. Years ago when I made doll clothes for myself, my fingers were lots smaller too! I gathered the sleeve at 1/4" and sewed it into the dress. I decided I was not going to try and put that seam into the serger for fear of cutting the fabric where I didn't want it cut. I did the side seams on the regular machine too, and wasn't going to serge them, for the same reason, but they were raveling so badly, that I figured I had to serge them. Below is the dress with sleeves in and side seams done.
On Emily's dress I'd used green to match the trim on the tab for the bottom facing. So I used the bottom of the doll dress to make a pattern for the hem facing.
To finish off the back opening I serged the edge of the back neck facing and turned it to the inside and sewed it down. Then I cut a piece of Velcro in half and attached it to the back opening. Emily's other doll dresses had Velcro in them. In the photo below you can also see the green hem facing.
I debated trying to do anything about buttons on the front tab. I did have some tiny ones, but they were white. So decided to not put any buttons on the tab.
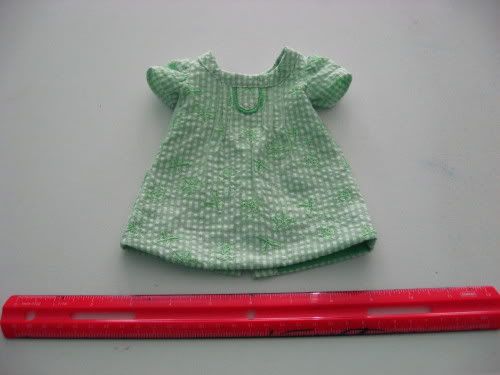
To get an idea of the size I took a photo of the finished doll dress next to a 12" ruler.
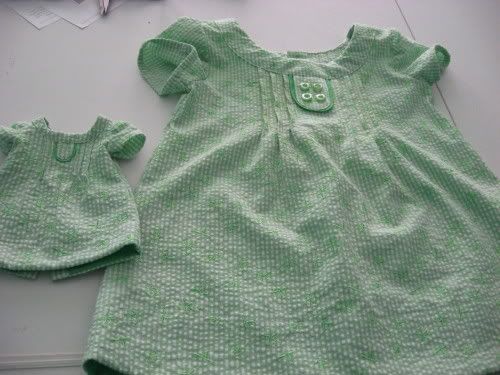
And also one next to Emiy's dress.
Now they are all ready to be sent off to Emily. If today hadn't been the 4th of July, I'd have shipped them today. So first thing tomorrow it's off to UPS to send them out to her.
I can't wait to see Emily and her doll in their new dresses!!!
You did such a good job with these dresses! I'm so happy you joined the sew-along! I love the tiny little doll dress - I had do idea it would be so small! Very clever little tips for sewing something so little, like the way you layered the tab rather than using trim and using velcro rather than buttons so it's easier to put on.
ReplyDeleteMy daughter should get the package tomorrow. Then we'll see how well they fit!
ReplyDelete