It's often hard to find fabric to make things for little boys. There's tons of pretty fabric and patterns for their sisters. So when I saw a piece of fabric with Thomas the Train on it, I thought this is perfect! Grandson, Jake, is 2 and absolutely LOVES Thomas the Train.
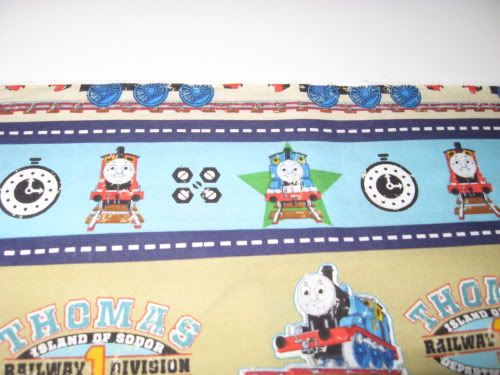
But the problem, as you might be able to see, is that the selvage is at the top of the photo, which means cutting the fabric on the straight of grain would have up-and-down stripes but all the images would be sideways. This would never do. So I bought extra fabric and set out to cut make a shirt on the cross grain, where the images would be going around the shirt body.
The safest way to make sure that everything matches as I wanted it to was to cut each piece separately. For a little boy's shirt there's only the back on a fold, 2 front pieces, the sleeves and collar. All I really need to match was the front to back going around at the side seams, and because of the print I wanted to match the center front as well.
When using baby or toddler patterns I copy the size that I want onto pattern paper (or you can get butcher paper really inexpensively at places with Gordon Food Service. Butcher paper is a bit thicker, but oh so much less expensive!) I use a Sharpie pen to copy the size from the pattern piece onto my butcher paper.
I folded the fabric and pinned the shirt back to it. Then took the shirt front and marked where the stripes were on the fabric onto the pattern piece. After cutting out the back, I unfolded the fabric and laid one of the shirt fronts out with the marks on the pattern lined up with the stripes on the fabric.
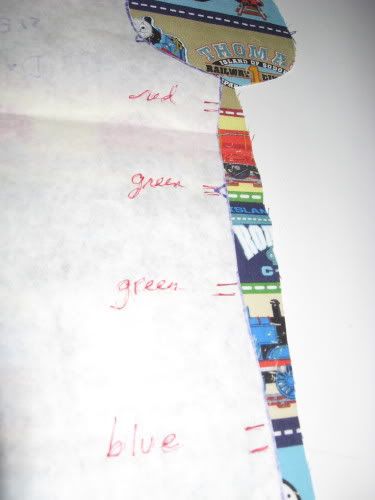
This photo shows the marks I'd made on the front at the side seams so that they would line up correctly with the back at the side seams. I marked where the stripes were and labeled the colors of them. You can also see my pattern that I cut out of Butcher paper and get an idea of the thickness of it.
Then since I wanted the center fronts to match when the shirt was buttoned, I folded the front piece at the center front line and marked on the pattern what I needed on the fabric to make it match. I unfolded the front piece and pinned the facing part of it, and cut that front out. Then reversed it and using my marks lined it up with the fabric such that the center front would match.
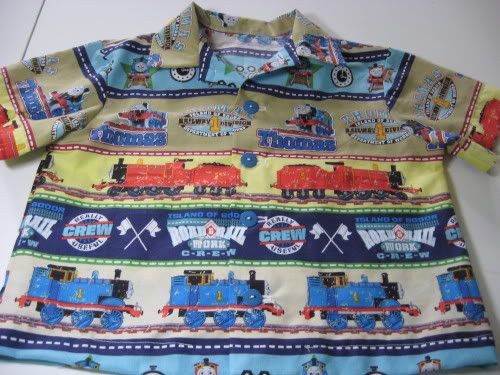
Fortunately for Jake his grandmother is a perfectionist! Here's the finished shirt with everything matching as I'd hoped. I have to say that I did NOT try to match the sleeves. I tried to center them on the fabric so that the had the same print on both, but I did NOT try to match them to the shirt. That just happened! And I couldn't have done it that well if I'd tried!!!
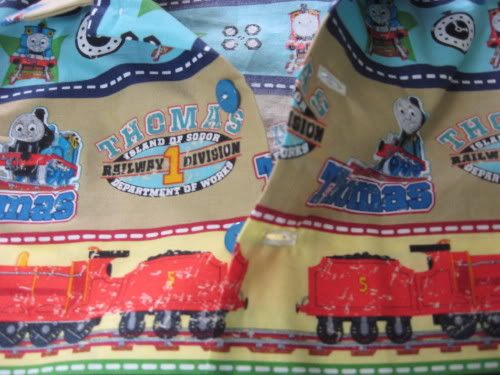
Here's the top of the shirt open so you can more easily see the buttons and the match of the fabric.
I just have to ship it off to Jake or wait till I see him the end of May and give it to him. I'll probably wait. I made a slightly larger size then he currently needs, and I have to make something for his twin sister, Emily, next.
No comments:
Post a Comment