The Oliver + S Family Reunion dress sew-along started on June 13. Here's the link to the Above All Fabric blog about it http://bit.ly/iDAd5b I was all set to go with my fabric from my stash, and the pattern and buttons I'd gotten at Haberman's. http://habermanfabrics.com/ 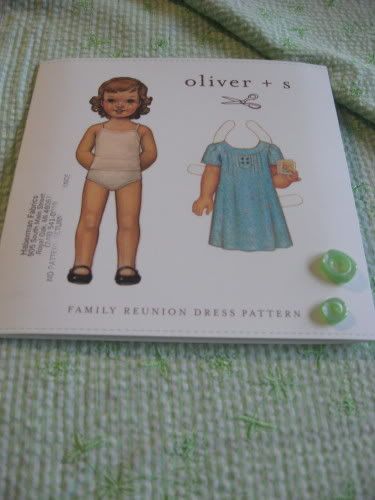
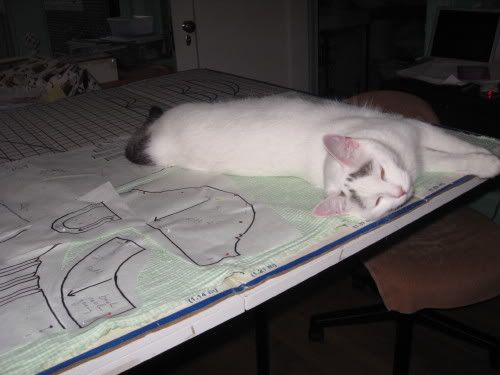
I'd already traced the size of the pattern that I needed and cut 2" off the bottom to give the right length dress for Emily. So I pinned the pattern to the fabric with the help of my trusty assistant, who has to inspect each step of the way. Baby has the idea that the cutting table belongs to her.
One of the first steps was ironing on the interfacing.
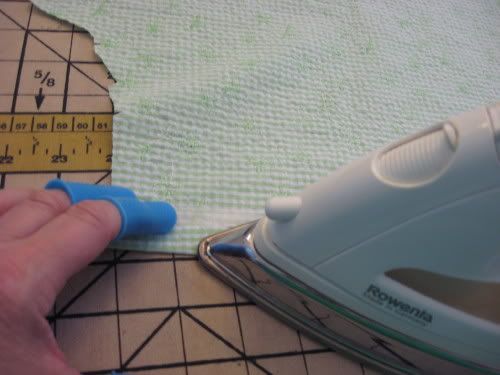
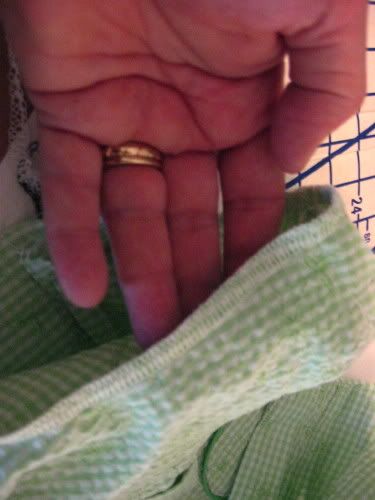
I had no idea what a great purchase those little silicon finger covers would be. But they've saved me many burnt fingers. So the interfacing has been pressed on and here I'm folding the back facing over.
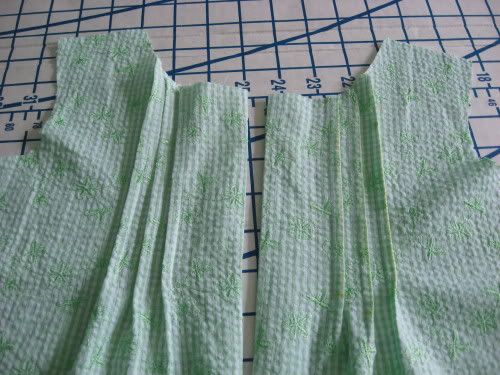
Next were the pintucks. I marked the right side of the fabric with yellow tracing paper, which shows up a bit in the photo, I think, but will wash out. I normally don't like to mark the right side of the fabric, but couldn't figure any other way to be able to see these. Here's the back.
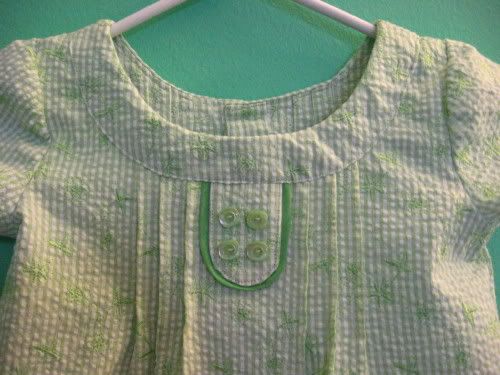
After the pintucks the little tab for the front was put together. As the sew-along was progressing, you could check out other people's photos on the Flicker site http://bit.ly/mP9Fhg. I'd seem several that had added lace, rick rack or some sort of trim around the tab, and I decided to do something like that myself. I had some leftover green in my stash that perfectly matched the green embroidery on the fabric. So I added that around the tab.
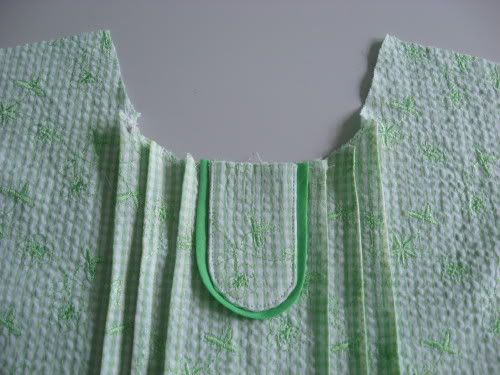
I thought it looked great until I looked at some of the other photos in the Flicker group and realized I'd put it on in the wrong spot.
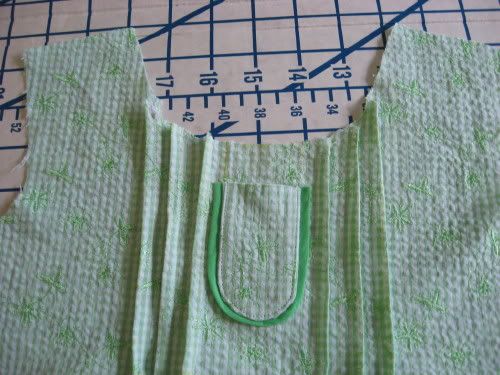
Now why am I showing you that I made a mistake? I was reading in Problogger http://bit.ly/llivPa the other day how people don't like it if you come across as perfect. They want to read a blog and see that you make mistakes just like they do. Hey, if we never made any sewing mistakes there would be no need for seam rippers. So I pulled off the tab and redid it. And here it is where it's supposed to be.
As I mentioned last time because of all the other family things I was trying to get finished before Father's Day weekend, I ended up getting behind with the sew-along, and didn't catch up till the last day.
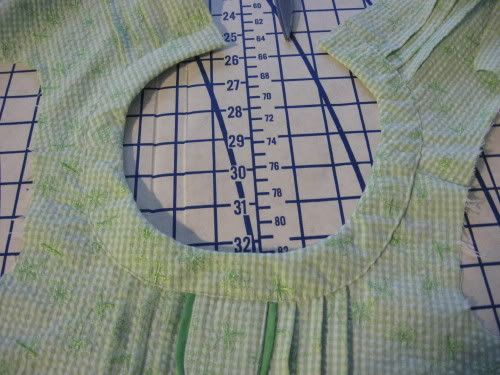
The shoulder seams and neck facing were different than any I'd ever done and required close watch of the instructions. Half of the shoulder seam was done 'normally' with right sides together, and the rest near the neck edge, was done with wrong sides together. I've always thought of a facing as being something inside that you didn't see, but that wasn't the case here. The neck facing was sewn to the wrong side of the neck and then turned over to be the neck edge on the right side.
Now that the neck facing is on it's obvious why the tab had to not be at the top edge or a lot of it would have been hidden. Glad I saw that before I got too far!
Next came the sleeves. I noticed that my fabric was raveling a lot, you can probably see it in the photo above, so I decided to serge the seams. With sleeves I always run gathering threads between the front and back notches, gather the sleeve a bit and use a lot of pins to hold it in place. Then I run the seam on my regular sewing machine, pull out all the pins and check that it's the way I want it to be before going to the serger. For this dress, since they were using 1/2" seams, I adjusted the serger to be a narrow 3-thread overlock. I run the serger slowly and keep moving the fabric out of the way so that I don't catch a part of the dress or cut something that I don't want to cut. The photo below is after the sleeve seam was serged.
The sew-along recommended using French seams for the side seams. Since my fabric wasn't sheer and I'd already worked out the serger settings, I serged the side seams instead.
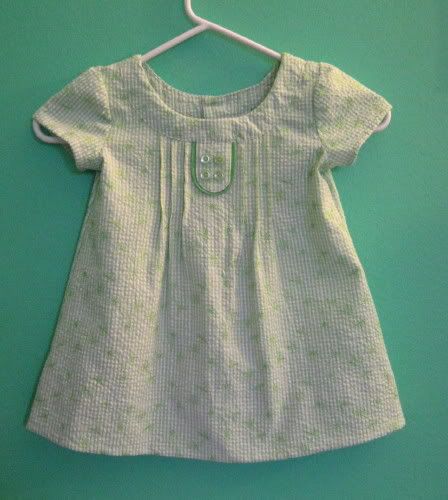
The hem facing was the next step. I was concerned about having enough of the green seer sucker left to make the doll dress that Emily's Mommie had asked me to do, so I used the solid green that I'd used for the tab trim for the hem facing. Since Emily is short I decided not to add the 5 rows of stitching at the bottom. Next came button holes and buttons. The buttons looked a bit delicate and I didn't want to break them so I sewed them on by hand, after making the button holes with the machine. And here's the final dress.
Along with a close up of the top.
Now all I have to do is make the doll dress and something for Emily's twin brother, Jake and I can ship the new outfits off to them. I'll add a photo of Emily and her doll in their dresses when I get them.
I'd already traced the size of the pattern that I needed and cut 2" off the bottom to give the right length dress for Emily. So I pinned the pattern to the fabric with the help of my trusty assistant, who has to inspect each step of the way. Baby has the idea that the cutting table belongs to her.
One of the first steps was ironing on the interfacing.
I had no idea what a great purchase those little silicon finger covers would be. But they've saved me many burnt fingers. So the interfacing has been pressed on and here I'm folding the back facing over.
Next were the pintucks. I marked the right side of the fabric with yellow tracing paper, which shows up a bit in the photo, I think, but will wash out. I normally don't like to mark the right side of the fabric, but couldn't figure any other way to be able to see these. Here's the back.
After the pintucks the little tab for the front was put together. As the sew-along was progressing, you could check out other people's photos on the Flicker site http://bit.ly/mP9Fhg. I'd seem several that had added lace, rick rack or some sort of trim around the tab, and I decided to do something like that myself. I had some leftover green in my stash that perfectly matched the green embroidery on the fabric. So I added that around the tab.
I thought it looked great until I looked at some of the other photos in the Flicker group and realized I'd put it on in the wrong spot.
Now why am I showing you that I made a mistake? I was reading in Problogger http://bit.ly/llivPa the other day how people don't like it if you come across as perfect. They want to read a blog and see that you make mistakes just like they do. Hey, if we never made any sewing mistakes there would be no need for seam rippers. So I pulled off the tab and redid it. And here it is where it's supposed to be.
As I mentioned last time because of all the other family things I was trying to get finished before Father's Day weekend, I ended up getting behind with the sew-along, and didn't catch up till the last day.
The shoulder seams and neck facing were different than any I'd ever done and required close watch of the instructions. Half of the shoulder seam was done 'normally' with right sides together, and the rest near the neck edge, was done with wrong sides together. I've always thought of a facing as being something inside that you didn't see, but that wasn't the case here. The neck facing was sewn to the wrong side of the neck and then turned over to be the neck edge on the right side.
Now that the neck facing is on it's obvious why the tab had to not be at the top edge or a lot of it would have been hidden. Glad I saw that before I got too far!
Next came the sleeves. I noticed that my fabric was raveling a lot, you can probably see it in the photo above, so I decided to serge the seams. With sleeves I always run gathering threads between the front and back notches, gather the sleeve a bit and use a lot of pins to hold it in place. Then I run the seam on my regular sewing machine, pull out all the pins and check that it's the way I want it to be before going to the serger. For this dress, since they were using 1/2" seams, I adjusted the serger to be a narrow 3-thread overlock. I run the serger slowly and keep moving the fabric out of the way so that I don't catch a part of the dress or cut something that I don't want to cut. The photo below is after the sleeve seam was serged.
The sew-along recommended using French seams for the side seams. Since my fabric wasn't sheer and I'd already worked out the serger settings, I serged the side seams instead.
The hem facing was the next step. I was concerned about having enough of the green seer sucker left to make the doll dress that Emily's Mommie had asked me to do, so I used the solid green that I'd used for the tab trim for the hem facing. Since Emily is short I decided not to add the 5 rows of stitching at the bottom. Next came button holes and buttons. The buttons looked a bit delicate and I didn't want to break them so I sewed them on by hand, after making the button holes with the machine. And here's the final dress.
Along with a close up of the top.
Now all I have to do is make the doll dress and something for Emily's twin brother, Jake and I can ship the new outfits off to them. I'll add a photo of Emily and her doll in their dresses when I get them.
I love it!!! I do the same thing with my serger. :-) Only funny thing is I forgot to serger one of my side seams. DOH! I only noticed after I had all 6 rows the stitching done on my hem facing. So it's just getting a zig zag where I can easily access!
ReplyDelete